Oh the joys of home-ownership. A minor leak prompted a phone call to the plumbers (to be sure it didn’t turn into anything major) and they ended up hacking out part of the wall of three rooms on each of the three levels to replace this massive pipe:
(If you’re in the Ottawa area and in need of a plumber, Belanger Plumbing is the one to contact – they were fantastic!)
While we dreaded having to patch, paint, and do whatever to cover these crazy holes, it presented an opportunity to my want-to-be-a-designer self. First stop, the kitchen nook! Let’s take a look again at what we had to deal with:
Crazy, right?!
What was there before you ask? Since we park our cars in the back of our home, it is used as our primary entrance so I made a makeshift mudroom complete with a bench that had open baskets and a matching wall mounted unit that had more open storage and hooks for our coats. I don’t have a picture of the exact one we used but this one is close:
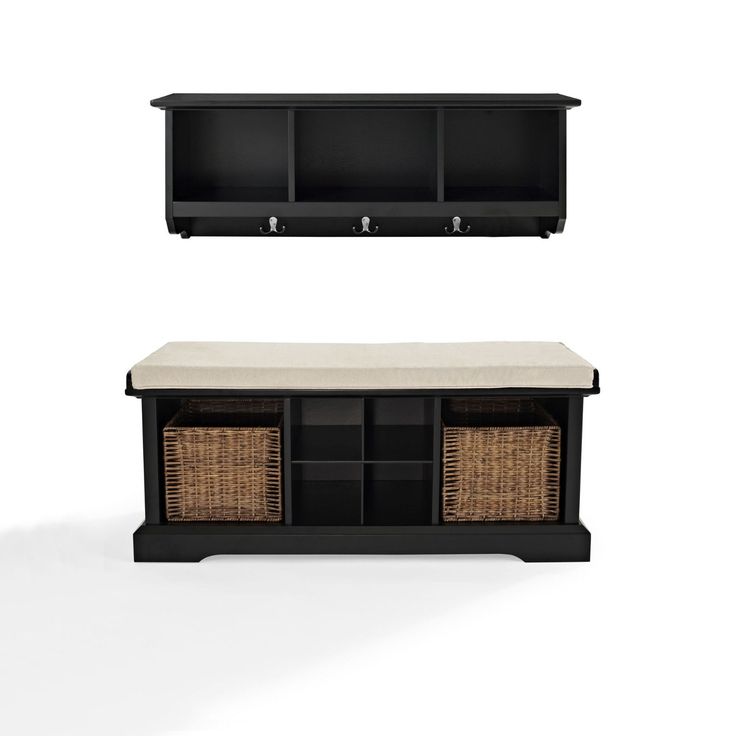
(Source for this picture is unknown – if you have the source, please let me know so I can properly credit them!)
While initially we thought this would be a good idea, in practice, it failed. We (read: I) junked up the baskets with crap I didn’t know where else to put, when we hung our coats, it was awkward to sit on the bench so it never got used, the dirty boots were always on display on the industrial-type carpet we had to keep because of the weather, etc. Ultimately this set-up was pretty useless to us so we sold it on Kijiji (a Craiglist equivalent) and I reconfigured our pantry to house our coats, etc. I needed another solution for the space!
As our kitchen is closed off from the other living spaces (and because I feel like I live in the kitchen!), I wanted some sort of seating area where people could come and chat with me while I cook and prepare meals – it can get pretty lonely! Also my little girl loves to come and see what’s so interesting in the kitchen (I swear I’m always in there) so a little area for her (and her buddies) to sit, read, chat, (keep me company!) would be ideal. The ideas started to flood in. And I became excited. And John became scared. Here’s what my design board looked like:
Since we have a black and white kitchen, I thought a hit of red might give it a little punch, so in came the red lighting, the red fabric and small accents of red in the art prints.
After measuring out the space, we created an L-shaped bench using IKEA’s “Besta” line and then I got busy making the bench cushion myself out of some fun fabric red polka dot fabric. I found some cute Rifle Paper Co prints and some heavy duty circular mats from IKEA (they’ve since been discontinued but they were from the “Tvis” line) that would round out the space. My wallpaper choice (from Bouclair!) was NOT John’s first choice but after a little cajoling, he let me run with it (Big thank you to my father-in-law for installing it so perfectly! Thank you JM!!)
Here’s what the space looks like now:
The throw pillows are from Chapters and the heart-shaped light box on the left is from Michaels. You wouldn’t know it but that light box installation and massive frame cover up about 4 light switch panels that we couldn’t hide. It was a challenge to figure out what to do on that wall since we couldn’t drill into it but I’m thrilled with how it turned out (Side note: I’m becoming an expert on hiding ugly wall features).
On the bench we put slab front doors and decided that no handles would give it a more streamlined look (the doors open by pushing on them). What I didn’t realize when purchasing these benches was how much storage they provided! I picked up eight (!) big shiny red tubs from our local dollar store (Dollarama) and two fit into each cubby. So. Much. Storage. Nothing is really in them yet so they haven’t been labelled but soon (my label maker is on standby).
While I wanted to put a table into that space, it made it a little tight in the winter months since we still use that entrance to take off all of our outerwear but come summer, the table will be coming back! (I promise to update you with more pictures!)
Here’s one final look:
Isn’t it cute? It makes me smile every time I walk into the kitchen. My lonely kitchen days are over 🙂



CaiTlin says
I love that wallpaper and the prints! I am always in awe when someone can construct something this gorgeous from basically a hole in the wall! Well done!
Lidia says
Thanks Caitlin!! xoxo
Shirley says
You really turned a disaster area into a remarkably cozy spot…all so beautifully & skillfully decorated. The use of RED really gives the black & white kitchen some “punch”! Congratulations ,well done
Lidia says
Aw thanks Shirley!!! (Missing you guys!!) xoxo
Ariel says
Too cute! The giant polka dots are my favourite ☺️ Great use of a space thoigh!
Ariel recently posted…Woodland Critter Baby Shower
Lidia says
Aw, thanks friend!! xo
Lesley metcalfe says
What a great way to use this space. Love your new little kitchen nook!
Lidia says
Thanks so much Lesley!!
Jessica says
I love that wallpaper! I also love the colour scheme, the red really makes that space pop!
Jessica recently posted…Organizing Children’s Bedrooms
Lidia says
Jess you’re the best! Thank you!!
Rockwell Marsh says
Hello Lidia, it is a great combination of black and red. I love it and also love polka dots. I like all wallpapers, furnitures and arrangements. Really, you have a beautiful house. Thank you for sharing a lovely blog.
Lidia says
You are so sweet, thank you!!