Remember the ORC (“One Room Challenge”) I recently did? (Of course you do since I’ve been yim-yammering about it for weeks!) In the rush of getting it all done, I didn’t have a chance to tell you what I did with the floor since replacing it was my last option. Here’s what it looked like before:
 It’s supposed to be a shiny black marble tiled floor but we don’t think the marble was ever sealed properly (or I used a way-too-harsh cleaner on the floor which killed all the luster and shine). There was an uneven haze as well along with really dingy coloured grout!
 So I started hunting for possible ways to refinish the floor without having to replace it (Time was a factor!)
First up was addressing the grout lines. In comes this grout paint which we picked up in “Snow White”:
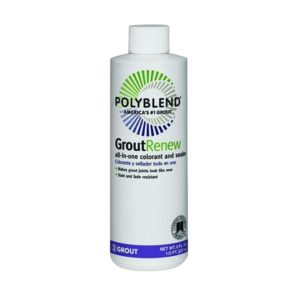 Photo courtesy of Home Depot
I originally found this idea via the blog “Young House Love” who showed me how amazing this product could be so I gave it a shot. You can pick it up at Home Depot for about $17 which was a small investment even if it didn’t work. But holy crap IT WORKED!!!
 Already the tile looked a million times better than it did before because of these newly painted grout lines – it made it look so fresh!
The process to applying it was easy (you basically just paint the grout lines) but it is TIME CONSUMING! If you want to give it a try, use a paint brush with a similar thickness to your grout lines (or smaller). It will make your life easier. You can do the “slather it all on, wipe it off” technique but this stuff dries FAST! (I learned that the hard way). So the best way to do it is to pour a little grout paint in a container and slowly and methodically paint each grout line while being quick to wipe off any excess you put on the tile with a wet cloth or paper towel. It does take a lot of time to apply it but believe me it’s worth it!
Next up was how to get the discoloured tile back to some semblance of lovely without having to grab a grinder. Say hello to this baby:
Photo courtesy of Home Depot
This product adds a polymer coating to your floor which is supposed to give your flooring the shiny sheen it used to have. I took a microfiber cloth, some protective gloves (and ventilation of course) and then followed the directions. Basically you throw some solution on the ground and go to town! Did it work? I’m happy to say YES!
 The number of coats depends on your flooring but for mine (which were really bad) I needed 4 coats and I had to touch-up some areas. You only need to give each coat about 45 minutes to dry before applying another one so the whole process can be done pretty quickly.
 While my floor is still not perfect (I still have some scratches, etc that the product couldn’t fix), it really freshened it up to the point where it does look like newish tile. And the difference to what we had before is crazy good (See that shine in the middle? That’s the vanity’s reflection, not my flash!) I really thought I’d have to refinish these floors the old school way which would have taken me A LOT more time and skill (grinding tile is an art!) but for about $35 total for both products, I saved not only time but a whole lot of effort too!
(*Please keep in mind I am NOT paid for endorsing these products but I will always share with you fun finds like this which can be life-altering! Ok not life-altering but certainly a happy surprise!*)



Shirley says
We’ve seen ‘the before” up close & personal…it did need some renewing or major help! Can hardly wait to see the NEW look …the photos show you have totally rejuvenated the shine/lustre/life to the tiles.
Lots of work ,eh! But worth it!
Lidia says
Thank you Shirley!!! Ooh I can’t wait for you to see them! xo
Ashley says
Omg! This was so helpful! The grout in between my tiles in my kitchen were getting so dirty…I would mop and scrub it but it just wasn’t looking good! This grit refresh is awesome! Thanks for the post
Lidia says
Thanks Ashley!! Let me know what you think if you try it out!
Kristen says
This is great info – especially the grout renew – what a difference! I will definitely try this in my kids’ bathroom!
Lidia says
Thanks Kristen!! It’s time consuming but dang, it works!
Carrie says
That’s amazing!!
Lidia says
Thanks Carrie!
Jessica Vanderveen says
I’ve used the grout renew before and it is amazing how just cleaned up grout makes the tile look brand new!
Jessica Vanderveen recently posted…DIY Industrial Curtain Rod, Brackets and Finials
Lidia says
Right?!?! My hubby is so convinced that now he’s looking everywhere to use this stuff! LOL!
Terri says
I am going to totally try this! Thanks for sharing your experience!
Lidia says
That’s wonderful! Let me know how it goes!!